Windows updates may fail to install when system files or component store data become corrupted. Deployment Image Servicing and Management (DISM) is a command-line tool used to service and repair Windows images, including the local Windows image, Windows Recovery Environment, Windows Setup, and Windows PE (WinPE). On modern Windows versions—including Windows 11, Windows 10, and supported versions of Windows Server (such as Windows Server 2016 or later)—DISM and System File Checker (SFC) provide documented methods to restore component integrity and resolve installation failures.
Research Method and Limitations
This technical guide was prepared strictly from the supplied public Microsoft Learn troubleshooting documentation excerpts. Material limitations include unavailable competing coverage, truncated documentation passages, and missing procedures for non-DISM repair scripts. Error code 0x80070057 is not present in the supplied error reference table, so this guide covers the verified general servicing repair workflow for Windows Update corruptions rather than unverified error-specific parameters.
How DISM Servicing Repair Works
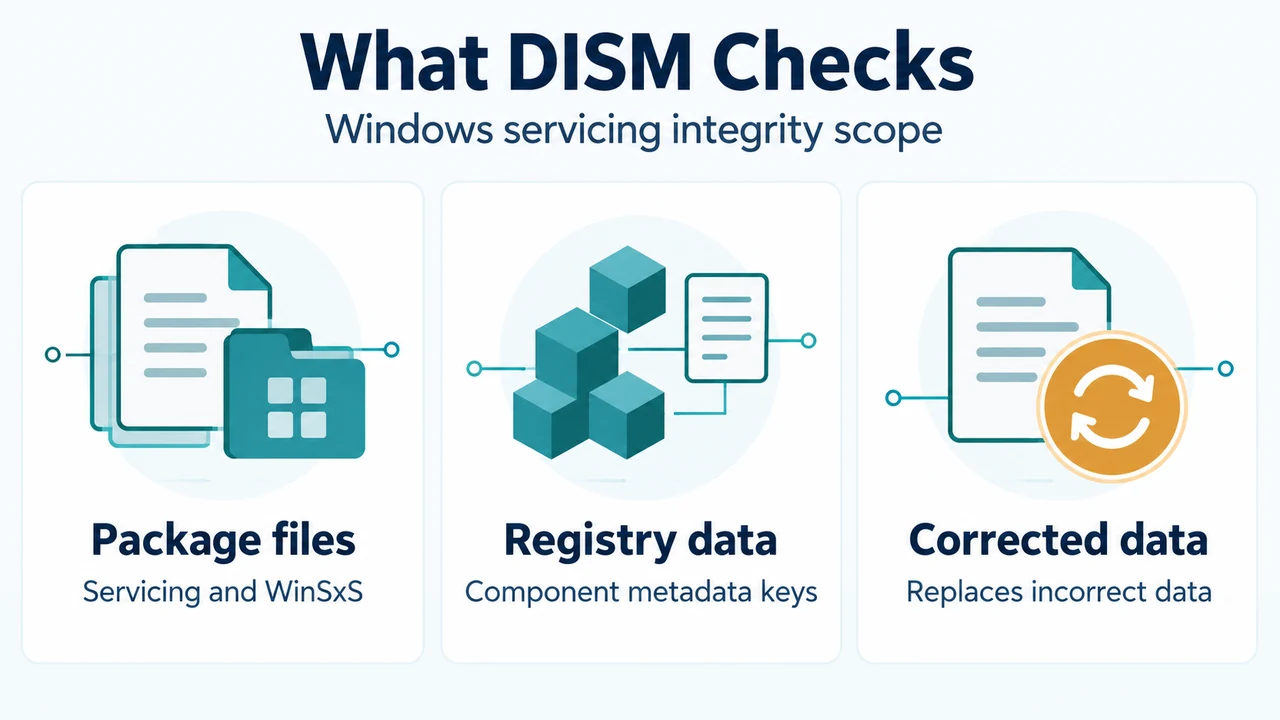
When DISM detects incorrect manifests, Cabinets, or registry data, it may replace the incorrect data with a corrected version. DISM verifies integrity across the following file directories and registry subkeys:
%SYSTEMROOT%\Servicing\Packages%SYSTEMROOT%\WinSxS\ManifestsHKEY_LOCAL_MACHINE\ComponentsHKEY_LOCAL_MACHINE\SchemaHKEY_LOCAL_MACHINE\Software\Microsoft\Windows\CurrentVersion\Component Based Servicing
Step-by-Step Servicing Repair Procedure
To repair corruptions and address update installation failures, perform the following steps in an elevated command prompt.
1. Run the Standard DISM RestoreHealth Command
Open the Start menu, type Command Prompt, right-click Command Prompt, and select Run as administrator. DISM repair works best when connecting to Microsoft Update servers to fetch missing or corrupted files. Run the standard command:
DISM.exe /Online /Cleanup-image /RestorehealthThis command may take several minutes to complete.
2. Alternative Repair Source (When Offline or Disconnected)
If your computer cannot connect to Windows Update, you can alternatively specify a working Windows installation running the same operating system version as a repair source, or point to files from a network share, USB, or DVD:
DISM.exe /Online /Cleanup-Image /RestoreHealth /Source:\\<servername>\c$\windows /LimitAccessReplace <servername> with the computer name of the reference machine. Alternatively, if repair files are extracted locally to a folder such as C:\temp\Source\, run:
DISM /Online /Cleanup-Image /RestoreHealth /Source:C:\temp\Source\ /LimitAccess3. Run System File Checker (SFC)
If the DISM scan result states “The restore operation completed successfully”, proceed to run the System File Checker:
sfc /scannowThis operation may take several minutes. Once complete, close the command prompt and run Windows Update again.
4. Review CBS Logs and Verify Health
DISM logs found and repaired issues to %windir%\Logs\CBS\CBS.log and %windir%\Logs\CBS\CBS.persist.log (where %windir% is typically C:\Windows). If the restore operation did not complete successfully, inspect CBS.log for errors (such as missing package files like CBS MUM Missing or corrupted payloads like CSI Payload Corrupt). After addressing missing update packages, verify resolution by running:
DISM /Online /Cleanup-Image /ScanHealth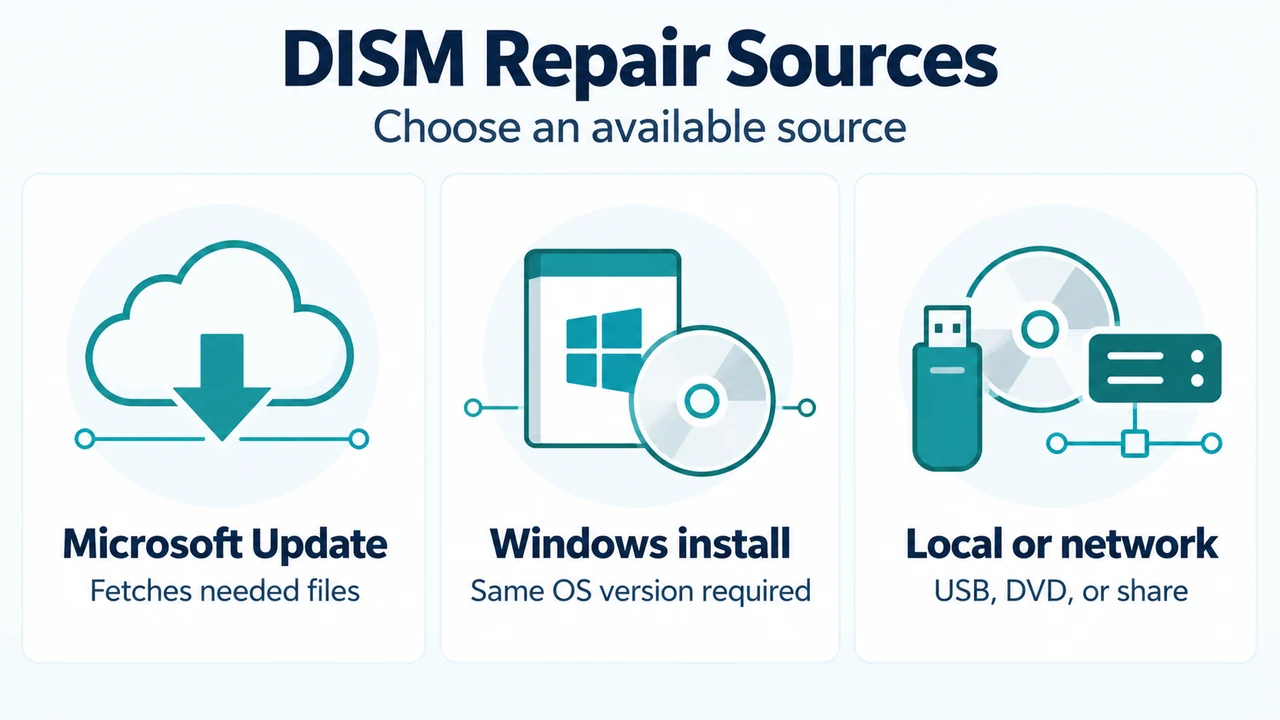
Text version of the diagrams
- What DISM Checks: Package files — Servicing and WinSxS; Registry data — Component metadata keys; Corrected data — Replaces incorrect data
- DISM Repair Sources: Microsoft Update — Fetches needed files; Windows install — Same OS version required; Local or network — USB, DVD, or share