When repairing a Windows image (such as Windows 10 or Windows 11) using Deployment Image Servicing and Management (DISM), you can scan for corruption and restore the image using alternative repair sources instead of relying solely on default Windows Update locations.
Applies-To Scope
This guidance applies to Windows 10 and Windows 11 servicing workflows for online operating system images as well as offline images stored in WIM or VHD formats.
Step 1: Check If the Image Is Repairable
Before running repair operations, scan and inspect the image to determine whether corruption has been detected:
Dism /Online /Cleanup-Image /ScanHealthScanning the image checks for corruption and takes several minutes. After scanning, inspect the status with:
Dism /Online /Cleanup-Image /CheckHealthDISM reports whether the image is healthy, repairable, or non-repairable:
- Healthy: No corruption was detected.
- Repairable: Corruption is detected and can be repaired using the
/RestoreHealthargument. - Non-repairable: The image cannot be repaired. In this case, discard the image and start again.
For a quick check of an online image, you may be able to use the command sfc /scannow to scan and repair files. For a more extensive check that can repair issues with the store, use DISM /Cleanup-Image.
Step 2: Choose and Prepare a Supported Repair Source
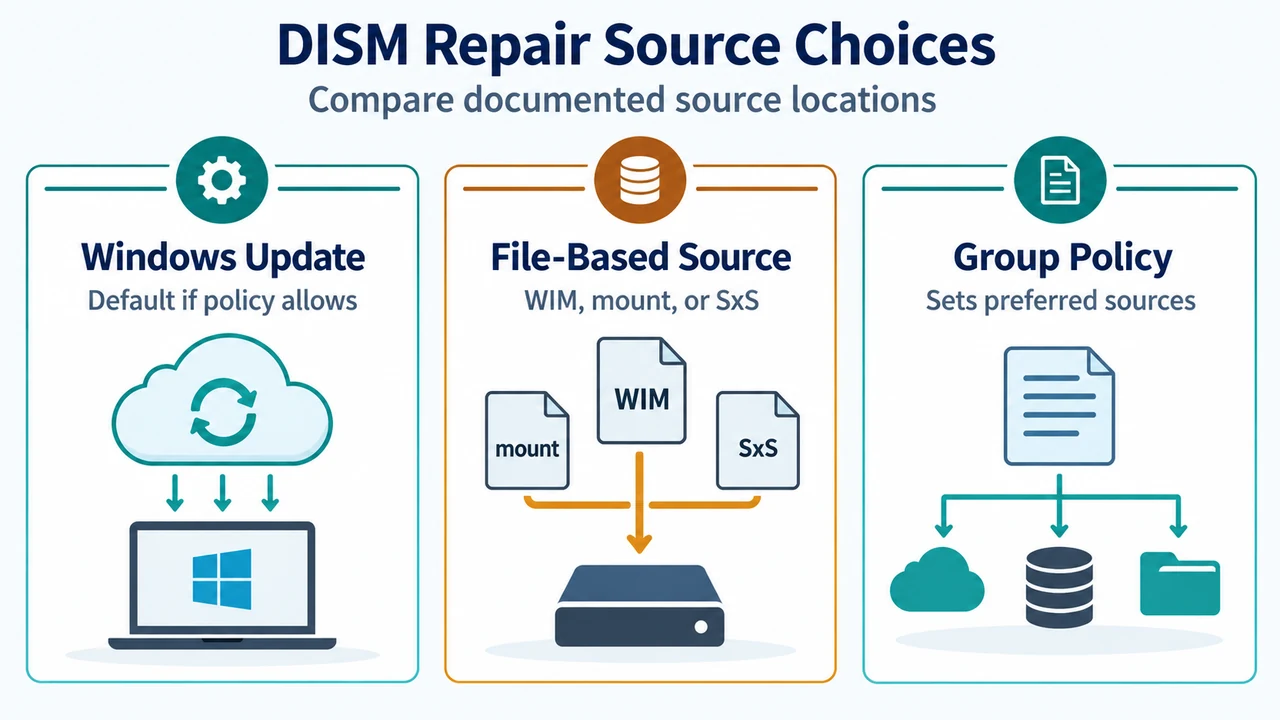
A repair source provides the files needed to repair a corrupted Windows image or restore optional features. Windows Update is used by default if allowed by policy settings on the computer. If you use Windows Update as a primary or backup repair source, make sure your firewall is configured to allow access to Windows Update.
As an alternative to Windows Update, you can specify file-based sources:
- Mounted Image: A mounted Windows image from a WIM file (for example,
c:\mount\Windowsorc:\test\mount\windows) can be used to repair a corrupted operating system or restore optional features. - Side-by-Side (SxS) Folder: A Windows side-by-side folder from removable media, such as Windows installation media, or a network share (for example,
z:\sources\SxS). - Direct WIM File: A Windows image (
.wim) file on a network share can serve as a source to restore optional features. You must specify the image index and include theWim:prefix (for example,Wim:\\network\images\contoso.wim:3). - Running Windows Installation: A running Windows installation can be used as a source to restore optional features by sharing its
c:\Windowsfolder over the network. If using an online shared installation, make sure that computer has access to Windows Update.
Source Constraints and Servicing Requirements
When selecting and maintaining file-based repair sources, follow these documented requirements:
- Use RTM Media Only: Only use RTM media regardless of whether the source is a WIM or a mounted Windows image. Refresh media excludes older file versions that the target operating system may need.
- Cumulative Update Level: Ensure the source is patched to the latest Cumulative Update. If the target operating system is patched to a higher level than the source, repairing the operating system or adding features may fail because required updated files are missing from the source.
- Multilingual Support: You must include all relevant language packs with your repair source files for the locales your image supports. Missing required language components will cause feature restoration to fail.
Step 3: Run DISM /RestoreHealth with /Source and /LimitAccess
To repair an image, run Dism with /RestoreHealth and specify your repair files with /Source. To repair an online image using your own source instead of Windows Update, run:
Dism /Online /Cleanup-Image /RestoreHealth /Source:c:\test\mount\windows /LimitAccessKey argument behaviors include:
/Source: Specifies the location of the repair files. If you specify more than one/Source, DISM copies files from the first location where they are found and ignores the remaining locations. If you do not specify a/Source, the default location for Features on Demand is used./LimitAccess: Prevents the DISM tool from using Windows Update as a repair source or backup repair source for online images.
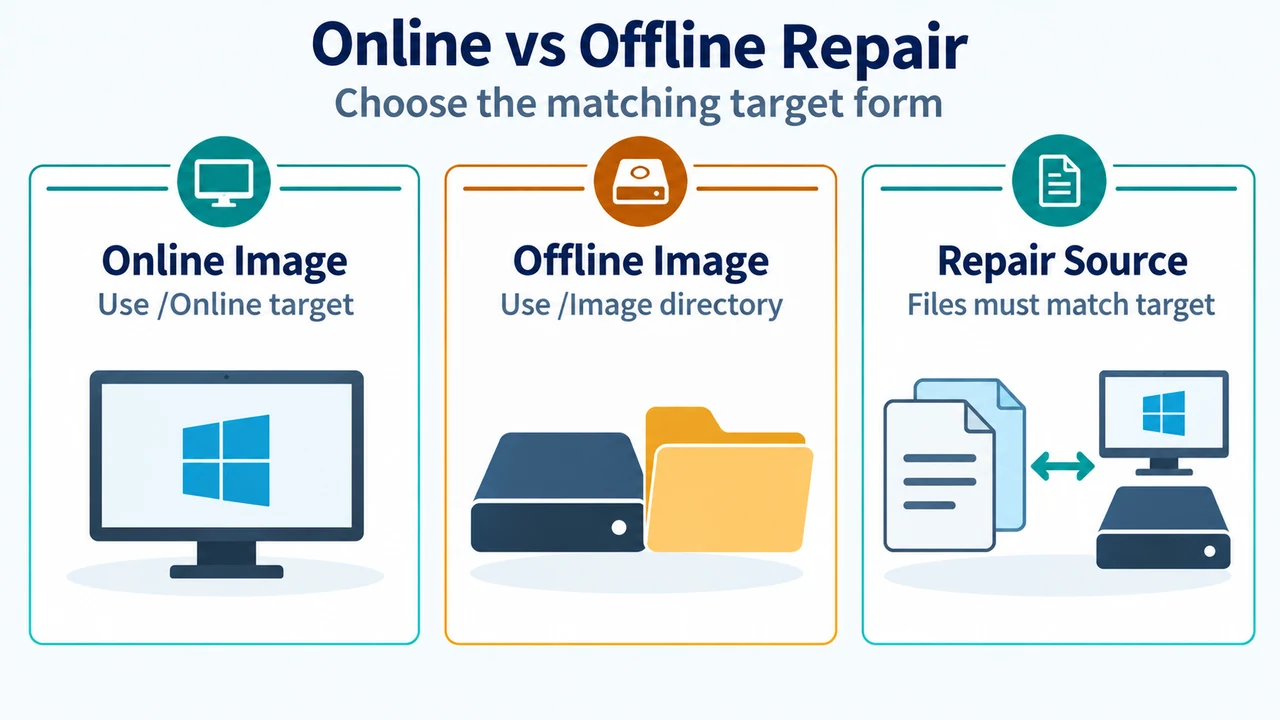
To repair an offline image using a mounted image as a repair source, specify the target offline directory:
Dism /Image:C:\offline /Cleanup-Image /RestoreHealth /Source:c:\test\mount\windowsStep 4: Configure Group Policy for Preferred Repair Sources
Group Policy can be configured to specify preferred repair sources for Features on Demand and automatic corruption repair:
- Open the Group Policy Editor (for example, on a computer running Windows 10, type
Edit Group Policyfrom the Start screen and select it). - Navigate to: Computer Configuration > Administrative Templates > System.
- Double-click the setting titled Specify settings for optional component installation and component repair.
- Select the settings that you want to use for Features on Demand.
Repairing Servicing Mount Points
In some cases, an image can become corrupted while modifying it with DISM. Run:
Dism /Cleanup-MountpointsThis command repairs the corrupted servicing state without unmounting images that are already mounted or deleting images that can be recovered using /Remount-Image.
Research Method and Limitations
This article was prepared directly from supplied public Microsoft Learn documentation excerpts for Windows 10 and Windows 11 servicing. Material limitations include reliance solely on the provided excerpts without unverified runtime error telemetry or undocumented policy parameters. In addition, because no competing coverage was available in the supplied material, competitor comparisons could not be assessed.
Text version of the diagrams
- DISM Repair Source Choices: Windows Update — Default if policy allows; File-Based Source — WIM, mount, or SxS; Group Policy — Sets preferred sources
- Online vs Offline Repair: Online Image — Use /Online target; Offline Image — Use /Image directory; Repair Source — Files must match target